You’re probably doing one of two things right now. You’re either pecking out a draft on a Chromebook and wishing your hands could keep up with your brain, or you’re staring at a backlog of podcasts, interviews, videos, and notes that should be reusable content by now.
That’s where chromebook speech to text gets interesting. Not as a novelty. As a production system.
For creators, speech to text does two jobs. First, it helps you draft faster when you need a script, outline, or article now. Second, it helps you turn spoken content into searchable text so your back catalog stops acting like a black hole. Old episodes, rough voice notes, meeting recordings, and unused interviews can all become raw material again.
The trick is using the right level of tool for the right job. Native ChromeOS dictation is fine for quick bursts. Google Docs voice typing is better for long-form drafting. Extensions and dedicated transcription tools are where the serious productivity gains show up, especially if you publish across platforms and need text you can repurpose.
Your Guide to Starting with Native ChromeOS Dictation
ChromeOS gives you a built-in dictation tool, and for lightweight work, it’s useful. You don’t need to install anything. You just need to turn it on once and know where it shines.
![]()
How to turn it on
Use this path on your Chromebook:
- Open the quick settings area from the bottom right.
- Go into Settings.
- Open Accessibility.
- Find the keyboard and text input controls.
- Enable dictation.
You can also launch it with the Chromebook shortcut for dictation after it’s enabled. Once it’s active, you can click into a text field, start the microphone, and speak.
That makes it handy for:
- Quick email replies when typing feels slower than talking
- Short comments and captions on social posts
- Rough notes during research
- Simple admin tasks like filling forms or writing short messages
Where it works well
Native dictation works best when the job is small and the stakes are low. If you need to get a paragraph into Gmail, jot down an idea for a future video, or outline a title while moving fast, it does the job.
For creators, that matters more than people admit. A lot of output starts as scraps. One sentence becomes a hook. A rough thought becomes a YouTube intro. A spoken note becomes a future article once you run it through a stronger editorial process.
If you want a deeper view of how systems interpret language after transcription, this background on https://contesimal.ai/blog/what-is-natural-language-processing/ is a useful companion.
Where it starts to break
The problem is that built-in dictation isn’t built for professional content work. Official Google help shows how to turn it on, but it doesn’t really solve the big friction points creators hit, including offline limitations and trouble with proper names and accents, as noted in Google’s Chromebook dictation support documentation: https://support.google.com/chromebook/answer/177893?hl=en
Practical rule: Use native dictation when you’d be okay cleaning up the result quickly. Don’t use it for a client script, a jargon-heavy draft, or a transcript you plan to mine later.
In practice, native ChromeOS dictation tends to struggle when:
- Your room isn’t quiet and there’s HVAC noise, traffic, or other voices
- You use names, product titles, or niche terms that aren’t common
- You speak with an accent the model handles less gracefully
- You’re drafting long-form content that needs rhythm, formatting, and fewer interruptions
That doesn’t make it bad. It makes it basic.
For Chromebook users who only need short bursts of speech to text, that’s fine. For podcasters, bloggers, marketers, and video teams, it’s usually the starting point, not the finished setup.
Unlocking Speed with Google Docs Voice Typing
If native dictation is for capture, Google Docs Voice Typing is for drafting. This is the point where a Chromebook stops feeling like a lightweight device and starts acting like a writing workstation.
Open a document in Google Docs, go to the voice typing option inside Docs, allow microphone access if prompted, and start speaking into the document. The experience is more comfortable than system-wide dictation because you’re already inside the place where long-form writing happens.
Why Docs is better for first drafts
Google Docs voice typing works best when you already know roughly what you want to say. Not perfectly. Roughly.
That’s ideal for creators. You don’t need polished sentences at the start. You need momentum. A podcast intro, newsletter opening, chapter notes, or a rough article draft is easier to speak than type when you’re trying to outrun overthinking.
I like this workflow for three specific tasks:
- Script starts for YouTube videos when the hook matters more than polish
- Article skeletons where you want all major points down before editing
- Podcast recap drafts while the episode is still fresh in your head
Commands that make it usable
What makes Google Docs voice typing more than a gimmick is that you can pair dictation with editing commands. Instead of treating it like a tape recorder, treat it like an interactive drafting tool.
Useful spoken commands include:
- Punctuation words such as comma or period
- Line control like new line or new paragraph
- Basic editing such as select paragraph
- Navigation like go to the end of the line
- Formatting commands such as bold that
Those commands matter because they reduce one of the biggest dictation killers, which is constantly reaching back to the keyboard.
Speak in chunks, not in streams. One idea, one sentence, small pause. That alone makes cleanup much easier.
A drafting method that works
Users often fail with voice typing because they try to dictate a final draft. That’s the wrong target.
Use this instead:
| Stage | What to say | Goal |
|---|---|---|
| Rough opening | Your hook and premise | Get moving |
| Core points | Main arguments in plain language | Build structure |
| Examples | Stories, examples, objections | Add depth |
| Cleanup pass | Keyboard and manual edits | Make it publishable |
This works especially well for bloggers, authors, and screenwriters because speaking lets you preserve natural cadence. If your content is meant to sound human on the page, your speaking voice is often a better starting material than your typing voice.
Where Docs still falls short
Google Docs voice typing is excellent for creating a rough draft inside one writing environment. It’s less useful when your day involves jumping between tools.
If you write in Docs, then move into Gmail, LinkedIn, a CMS, Slack, or a content planning board, you’ll feel the walls quickly. That’s where extensions and transcription apps start earning their keep.
Choosing Your Power-Up with Chrome Extensions and Apps
When built-in Chromebook dictation and Google Docs voice typing start feeling cramped, use browser extensions and dedicated apps. This is the optimal upgrade path for creators who write everywhere and repurpose constantly.
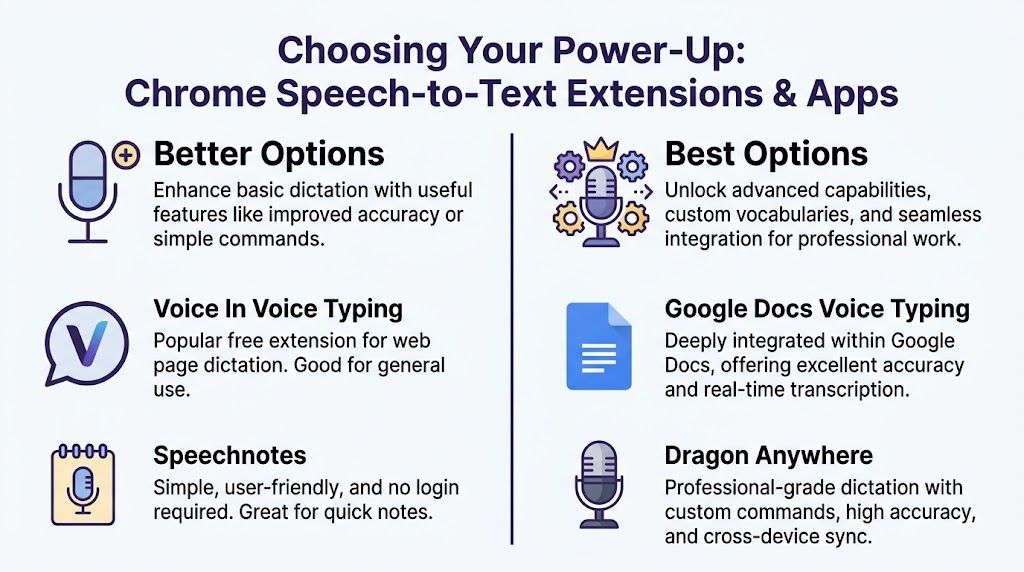
The good better best view
Here’s the simple way I’d break it down.
| Level | Best for | Trade-off |
|---|---|---|
| Good | Native ChromeOS dictation | Fast to start, limited for pro work |
| Better | Chrome extensions like Voice In | Works across sites, more flexible |
| Best | Dedicated transcription services and advanced apps | Stronger output, usually more setup or cost |
Better options for daily creator work
If your day happens inside the browser, extensions are the sweet spot.
Voice In is the standout practical option for many Chromebook users because it works across a huge range of web tools. It’s trusted by over 500,000 users, those users record over 5 million minutes of audio monthly, and it works on 10,000+ sites, according to its Chrome Web Store listing: https://chromewebstore.google.com/detail/voice-in-speech-to-text-d/pjnefijmagpdjfhhkpljicbbpicelgko
That matters because content work doesn’t live in one app. You might draft in Docs, paste into WordPress, answer collaboration notes in Slack, write outreach in Gmail, and clean up metadata in a CMS. Voice In follows that reality better than native tools do.
Its strongest practical use cases are:
- Writing social copy across platforms
- Adding fast notes to CRM or project tools
- Drafting email sequences
- Capturing rough article ideas anywhere there’s a text box
If you’re evaluating speech tools more broadly, Parakeet AI is worth a look as part of your research stack, especially if you’re comparing how different AI systems fit into creator workflows.
Best options for serious content libraries
Once you move beyond live dictation and into transcription of recorded assets, the conversation changes. You’re no longer asking, “How do I type less?” You’re asking, “How do I turn spoken material into reusable text at scale?”
That’s the point where dedicated tools win. They’re better for:
- Podcast transcripts
- Interview archives
- Meeting recordings
- Video drafts and subtitle workflows
- Searchable research collections
A good extension helps you write. A strong transcription workflow helps you mine your own catalog.
For a broader stack beyond speech tools alone, this roundup of creator software is useful: https://contesimal.ai/blog/best-ai-tools-for-content-creators/
The best tool isn’t the one with the most features. It’s the one you’ll actually keep open while you work.
What I’d choose for each scenario
- For quick web writing: use an extension.
- For long-form drafting in one place: use Google Docs voice typing.
- For audio and video assets you want to repurpose later: use a dedicated transcription workflow.
That’s the difference between convenience and strategic value. Convenience saves a few minutes. This method turns your archive into usable text.
The Ultimate Speech to Text Workflow for Content Creators
The most effective chromebook speech to text setup isn’t one tool. It’s a stack.
You need one method for capturing ideas live, another for drafting quickly, and a higher-accuracy path for audio or video you want to repurpose. Creators who publish consistently usually need all three.

Start with cleaner audio
Speech recognition quality rises or falls with audio quality first. Before you swap tools, fix the input.
A few habits make a visible difference:
- Use a headset mic or solid USB mic instead of relying on a distant laptop mic
- Close reflective noise sources like loud fans or open windows
- Keep your mouth at a consistent distance from the mic
- Record in smaller chunks when possible, especially for longer source material
If your environment is messy, even simple gear choices help. A practical guide to noise reduction headphones can help if you’re trying to control monitoring and surrounding noise while dictating or reviewing transcripts.
Use the right layer for the right task
This is the workflow I recommend for creators moving from hobbyist output to a repeatable publishing machine.
Live capture
Use native dictation or a browser extension for fast, disposable text.
You can dump the following:
- title ideas
- rough hooks
- outline bullets
- ad read concepts
- episode takeaways
Don’t chase perfection here. Capture velocity matters more.
Drafting
Move into Google Docs or your preferred writing environment and speak your first version. Keep it conversational. Most content gets stronger when the first draft sounds like a person talking, not a person trying to sound impressive.
Library transcription
For recorded audio and video, use a dedicated system built on stronger transcription models. Here, OpenAI Whisper stands out for Chromebook users through extensions and APIs. Whisper can reach 2.7% word error rate on clean audio and process a 60-minute file in about 17 seconds, based on this Whisper statistics roundup: https://www.aboutchromebooks.com/whisper-statistics/
That combination is what makes it useful for creators with a backlog. An old podcast episode stops being dead weight once you can transcribe it fast, search it, pull quotes, extract segments, and rebuild it into threads, articles, outlines, or email content.
A creator workflow that compounds
Here’s what that looks like in practice.
| Content source | Speech to text method | Repurposing result |
|---|---|---|
| Brain dump | Native or extension dictation | Fast outline |
| Article draft | Google Docs voice typing | First draft |
| Podcast episode | Whisper-based transcription | Show notes, clips, quotes |
| Interview archive | Dedicated transcript tool | Research library |
| Video backlog | File transcription workflow | Shorts, summaries, newsletters |
This is also where transcript quality becomes a strategy issue, not a convenience issue. If your transcript is sloppy, your repurposing work slows down. If it’s clean enough, your content library becomes searchable creative inventory.
A strong transcript pipeline is especially useful for podcast teams. If that’s part of your operation, this guide on turning episodes into text is worth bookmarking: https://contesimal.ai/blog/spotify-podcast-transcript/
Watch a practical walkthrough
A visual demo helps if you want to see the workflow mindset in action before setting up your own stack.
What usually works best
The cleanest setup for most creators looks like this:
- Capture ideas anywhere with lightweight dictation.
- Draft long-form in Docs with voice commands.
- Transcribe recordings with a stronger model when the content has lasting value.
- Store transcripts where they can be searched, tagged, and reused.
If a piece of audio might become future content, transcribe it once and keep it organized. That single habit pays off again and again.
That’s how speech to text stops being a convenience feature and starts acting like production infrastructure.
Troubleshooting Common Speech to Text Annoyances
Most Chromebook dictation problems aren’t dramatic. They’re just annoying enough to break your flow.

When the microphone won’t show up
Start with the obvious checks first.
- Check dictation is enabled in ChromeOS accessibility settings
- Confirm the site can use your mic in Chrome permissions
- Reconnect your headset or USB mic if you’re using one
- Restart the browser tab if the text field stopped responding
If you’re in Google Docs or a web app, site-level mic permission is often the culprit. A lot of users think speech to text is broken when the browser has blocked access.
When it says you’re offline or it won’t respond
Built-in Chromebook dictation depends on an online service path, so connection weirdness can stop transcription even when the rest of the browser seems fine.
Try this order:
- Reload the tab or document.
- Switch Wi-Fi off and back on.
- Close extra tabs if the device feels overloaded.
- Restart the Chromebook if the mic is hanging across apps.
That sequence fixes a surprising number of weird dictation failures.
When the text is wildly wrong
If the output is bad, don’t start by blaming the model. Fix the input.
Run through this list:
- Move to a quieter room
- Use a better microphone
- Speak in shorter phrases
- Slow down slightly on names and jargon
- Check that the correct language is selected
One practical habit helps more than people expect. Stop dictating while your laptop fan, room echo, or nearby conversation is competing with your voice.
Bad transcription often starts as bad capture. Cleaner input usually beats deeper settings.
When dictation lags behind you
Lag usually points to one of three things:
| Problem | Likely cause | Quick fix |
|---|---|---|
| Delayed response | Too many tabs or weak connection | Close tabs, reload |
| Choppy recognition | Mic issue or noisy input | Switch mic, reduce noise |
| Freezing in one app | App or tab glitch | Reopen the page |
If you work on a lower-powered Chromebook, browser extensions and cloud-backed tools often feel smoother than pushing everything through a cluttered session.
When selected text gets replaced
This one catches a lot of people. If text is highlighted and you start dictating, the system may replace the selection.
The fix is simple. Click exactly where you want the cursor first. Then start dictation. It sounds small, but it saves a lot of accidental deletions during editing.
Transform Your Chromebook into a Content Creation Powerhouse
A Chromebook becomes much more useful when you stop treating speech to text like an accessibility extra and start treating it like a production shortcut.
That shift changes how you work. You capture ideas before they disappear. You draft faster without waiting for the perfect sentence. You turn spoken content into written assets that can live again across newsletters, articles, clips, scripts, and research notes.
The bigger win isn’t just speed. It’s continuity.
Creators with a growing library don’t need more forgotten content. They need workflows that keep old material usable. A transcript from a podcast can become a blog draft. A dictated note can become a video outline. A recorded brainstorm can become a publishable essay after cleanup.
Three habits matter most:
- Use the built-in tool for quick capture
- Use Google Docs for rough long-form drafting
- Use stronger transcription systems for content you want to reuse later
That stack keeps your Chromebook simple while letting your workflow grow.
If you’re moving from casual publishing to a real content operation, speech to text helps in a very practical way. It reduces friction at the front end and increases reuse on the back end. That’s exactly what a creator needs when the goal is to publish more, organize better, and get more value from every recorded idea.
Frequently Asked Questions About Chromebook Dictation
What’s the best microphone for Chromebook dictation
A headset mic or a decent USB microphone usually beats the built-in laptop mic for serious work. The built-in mic is fine for quick notes, but dedicated mics usually give you cleaner capture and fewer correction headaches.
If you record scripts, podcast notes, or interviews often, use a mic setup you can keep consistent.
Does Chromebook speech to text work offline
Native Chromebook dictation is a poor fit for offline work. If you need more privacy or local processing, you’ll want a different setup than the standard built-in path.
That’s one reason many creators use separate tools for recorded files instead of relying on one built-in option for everything.
Why is built-in Chromebook dictation less accurate than I expected
Because it’s not tuned for every difficult scenario. The built-in speech-to-text path on Chromebooks relies on Google Cloud Speech-to-Text, and Google has published word error rate figures between 16.51% and 20.63% in general use, which helps explain the drop in accuracy with noise, accents, or unusual speech patterns: https://cloud.google.com/blog/products/ai-machine-learning/announcing-accuracy-evaluation-for-cloud-speech-to-text
That’s workable for light use. It’s frustrating for publish-ready text.
Is speech to text good enough for professional creators
Yes, if you use the right workflow. For quick drafting, absolutely. For a content library, also yes, but only if you use stronger transcription tools for recordings you plan to search, edit, and repurpose later.
Is dictation private enough for client work or unreleased content
That depends on the tool. Built-in and cloud-based systems often process audio remotely, while some advanced setups focus more on local handling. If privacy matters, review how each tool handles storage, retention, and processing before you use it for sensitive material.
Should I use dictation for final drafts
No. Use it for capture and first drafts. Then edit with your keyboard.
That single expectation change makes speech to text much more useful. Dictation gets you raw material fast. Editing turns it into publishable content.
If your biggest challenge isn’t just writing faster, but making your archive usable, Contesimal is built for that next step.ai) is built for that next step. It helps creators and content teams organize, search, and activate podcasts, videos, articles, and research so older assets can generate new ideas, cleaner workflows, and more value from the library you’ve already built.